
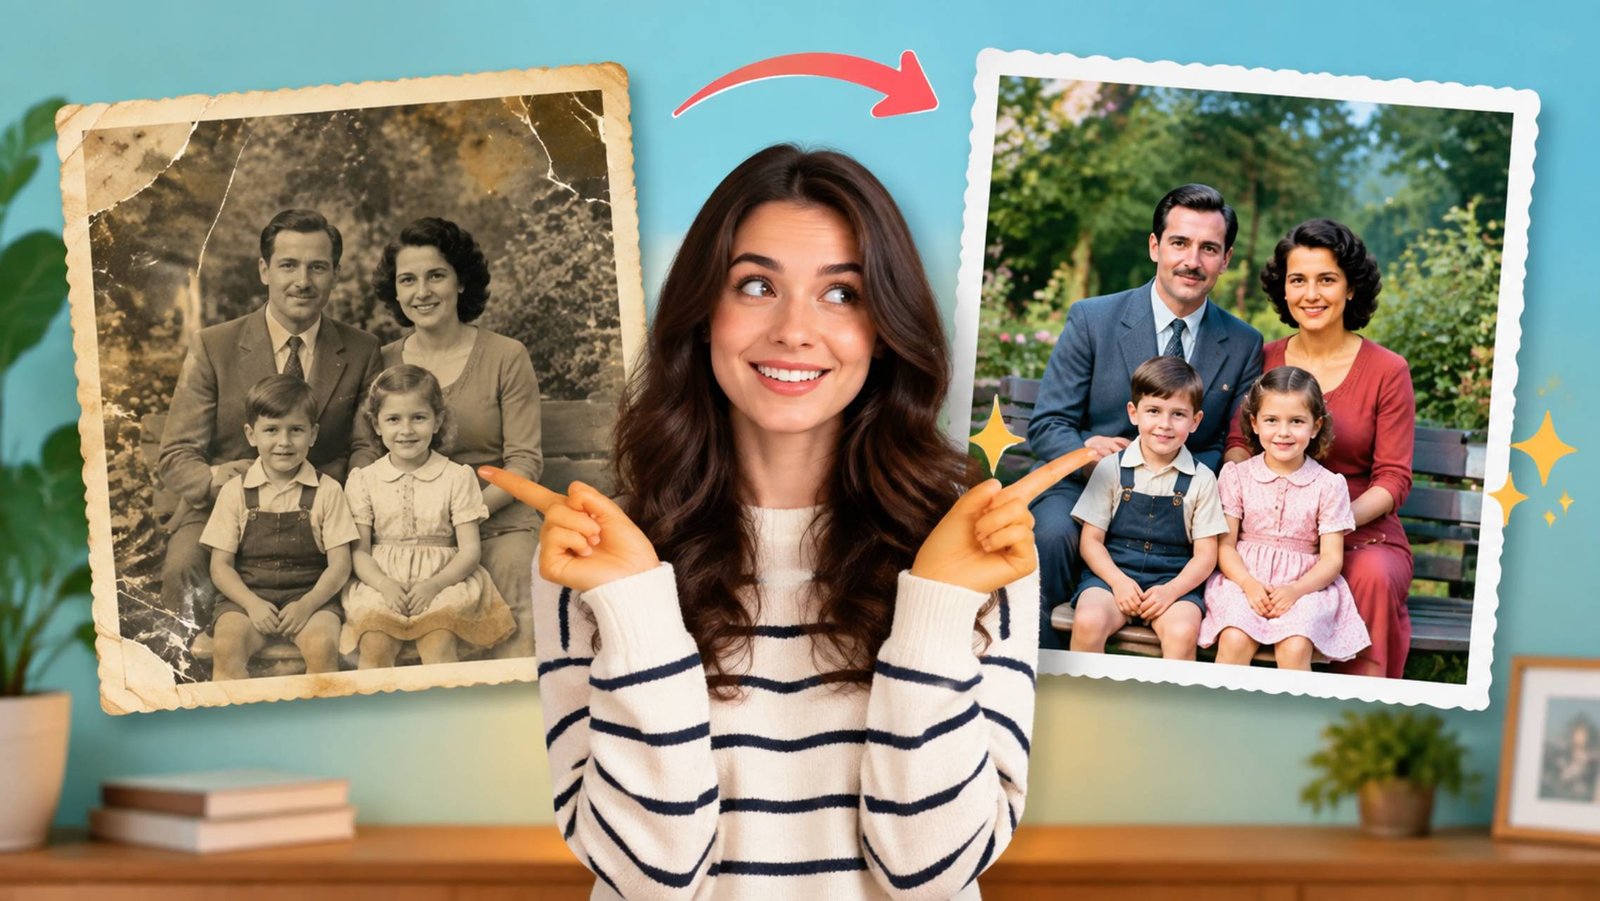
Every prompt in this series so far has done the same basic trick in reverse: take a photo from today and make it look like it was taken in 1985. This article does the opposite job, on photos that are already genuinely from that decade. If you’ve got a shoebox of faded prints, a scratched negative, or a water-damaged photo of your parents’ wedding, AI photo restoration tools can bring a surprising amount of that image back — without inventing a fictional version of a moment that actually happened.
That distinction matters more than it might sound. Everything else in this series is deliberately creative — reimagining a modern photo as something it never was. Restoration is the opposite instinct: recovering, as faithfully as possible, something that was already real but has been damaged or degraded by forty-plus years of sitting in an album, a drawer, or a damp loft.
How This Is Genuinely Different From the Retro Trend
The AI photo trend and photo restoration use overlapping tools but pull in opposite directions. While the 1980s photo trend focuses on creating a retro appearance, restoration focuses on preserving an authentic memory.The retro trend asks an AI model to invent a scene, an outfit, and a setting that never existed for a person as they look today. Restore old family photos recover detail, color, and clarity in a scene that genuinely happened, working from a damaged or degraded version of the real thing.
That difference has a real consequence for how honestly you can present the result. Everyone understands a creative 80s transformation as a fabrication, and it should be labeled as such if there’s any risk of confusion. A restored family photo, by contrast, most people treat as the real photograph —just clearer—which is mostly fair, but not entirely. The one place restoration still involves genuine invention is colorisation: when an AI tool adds color to a black-and-white photograph, it’s making an informed guess, not recovering data that was actually recorded. Worth remembering that distinction before you treat a colorized version as more “true” than the original monochrome print.
Preparing the Source Photo
Restoration results depend heavily on what you start with, arguably even more than the creative side of this trend does. This is where vintage photo enhancement becomes important, as the quality of the original scan often affects the final result.
If you’re working from a physical print, a flatbed scanner at a reasonably high resolution will give an AI tool far more to work with than a phone photo of a photo, which tends to introduce glare, slight blur, and color distortion from ambient lighting on top of whatever damage the original photo already has. If a scanner genuinely isn’t available, photograph the print in even, indirect daylight, dead-on rather than at an angle, with the camera held steady and the photo filling as much of the frame as possible.
Where you have a choice between several damaged copies of the same photograph — a print and a negative, say, or two different prints — start with whichever has the least physical damage and the most visible detail, even if its color has faded more. Recovering faded color is generally easier for these tools than reconstructing detail that’s been torn, creased, or scratched away entirely.
What AI Restoration Can Actually Fix
Fading and color shift. Old color prints, especially from cheaper film processing common through the 1980s, often shift towards orange, pink, or yellow over time as different dye layers degrade at different rates. For many families, family memories restoration is about protecting meaningful moments before old prints deteriorate further. AI restoration tools are generally strong at recognizing this specific pattern of color loss and correcting it back towards a more neutral, natural-looking palette.
Scratches, dust and small tears. Fine scratches, dust spots and small creases are usually the most reliably fixed category, because the tool has plenty of surrounding, undamaged detail nearby to draw on when filling in a small gap.
Low resolution and softness. Many family photos from the era were small prints, sometimes further degraded by being photographed or photocopied at some point. AI upscaling can meaningfully sharpen a soft or low-resolution image, though it’s worth understanding that fine detail added at this stage is partly inferred rather than purely recovered.
Black-and-white colorization. This is the most visually dramatic restoration and also the one to treat with the most awareness — the tool is estimating plausible colors based on what similar objects and skin tones typically look like, not reading color information that still exists in the photo.
Larger damage — bigger tears, missing corners, heavy water damage. These are recoverable to a degree, but the more of the original image is genuinely missing, the more the tool invents rather than restores in that area. Treat a heavily damaged photo’s result as a best-effort reconstruction, not a guaranteed match to what was actually there.
Prompts for Common Restoration Scenarios
Modern AI-powered photo editing allows users to guide restoration tools with detailed instructions while maintaining the original character of a photograph.
Basic Clean-Up and Color Correction
Restore this photograph by removing dust, scratches and minor creases, and correcting the faded colour back to a natural, balanced tone. Do not alter the people, their expressions, clothing or the background composition in any way — this is a restoration, not a recreation. Keep the result looking like a genuine vintage photograph, not an overly modern, digitally sharpened image.
Fixing faded orange or pink color cast
Correct the colour cast in this photograph, which has shifted towards orange/pink with age, back towards natural, accurate skin tones and colours. Preserve the original composition, expressions and all visible details exactly. Keep a subtle amount of natural film grain rather than making the image look digitally flat.
Repairing tears, creases and missing corners
Repair the tears, creases and damaged areas in this photograph, reconstructing the missing detail as plausibly as possible based on the surrounding image. Do not alter anything in the undamaged parts of the photo. Keep the reconstructed areas consistent in lighting, colour and texture with the rest of the image.
Colorizing a black-and-white photograph
Add natural, plausible colour to this black-and-white photograph, including realistic skin tones, hair colour and clothing colour appropriate to the period. Keep every person’s expression, pose and the original composition completely unchanged. Use a restrained, natural colour palette rather than oversaturated tones.
Upscaling a low-resolution or soft image
Increase the sharpness and resolution of this photograph, recovering as much genuine facial and background detail as possible without inventing features that aren’t suggested by the original image. Keep the people’s likenesses exactly as they appear in the source photo.
Recovering a water-damaged photograph
Restore this water-damaged photograph, correcting the warping, staining and colour bleeding as much as possible while keeping the original composition and every person’s likeness unchanged. Where detail is genuinely missing, reconstruct it as plausibly and conservatively as possible based on the surrounding image.
Where Restoration Prompts Commonly Go Wrong
Over-sharpening. Pushed too far, sharpening and upscaling can give skin an unnatural, almost plastic texture, or introduce a slightly artificial edge around hair and clothing. If a restored image starts looking more like a modern render than an old photograph bring old photos back to life, the sharpening is usually going too far, not the restoration succeeding.
Oversaturated colorization. A common failure in colourizing black-and-white photos is skin, sky, or clothing coming out too vivid — more like a modern digital photo than a period color print. Asking explicitly for a “restrained, natural” palette generally corrects this.
Losing the photograph’s character entirely. Removing all grain, all softness, and all of the photo’s original texture can leave an image technically cleaner but strangely lifeless — recognizably not the photo you started with, in a way that feels like a loss even when every individual fix was reasonable. It’s worth keeping a little of the original grain and tonal warmth rather than aiming for perfect, clinical clarity.
Inventing too much in badly damaged areas. When a large section of a photo is genuinely gone—a big tear, a missing corner covering part of someone’s face—an AI tool will still try to fill it in, and the result is closer to informed invention than restoration. Treat heavily reconstructed sections with appropriate skepticism, especially if they involve a person’s face.
Letting a restoration quietly become a reinterpretation. Occasionally, a restoration prompt will change someone’s expression slightly, adjust their apparent age, or alter a clothing detail while fixing the damage. If you’re restoring a real photo rather than creating a stylized one, it’s worth explicitly instructing the tool not to change anything beyond repairing the damage — this is the one place in the whole 1980s AI trend where you actively want less creative interpretation, not more.
A Note on Family and Privacy
Restoring an old family photo often means bringing a much clearer image of someone back into circulation — sometimes someone who has since passed away, sometimes someone who’s simply no longer in touch with the rest of the family. Restoring vintage photographs can help families reconnect with important moments while keeping the original history of the image intact. It’s worth pausing on how widely you plan to share a newly restored photo, separately from the decision to restore it in the first place, particularly for images involving people who aren’t around to have a view on it.
If you’re sharing a colorized version of a black-and-white photo, especially publicly, a brief note that the color is an AI estimate rather than a documented fact is a small but honest addition — colorization can occasionally get a genuine detail wrong (a very common example is misjudging exact clothing or eye color), and presenting a guess as verified fact, even innocently, is worth avoiding.
Finally, where a restoration project involves photos of people other than yourself and your immediate household, it’s good practice to check with them, especially before posting a restored, more widely visible version somewhere public.
Frequently Asked Questions
Can AI restoration bring back detail that’s genuinely gone from a damaged photo, or is it always a guess?
For small areas of damage — a scratch, a small tear, mild fading — the tool usually has enough surrounding information to make a reliable recovery. For larger missing areas, particularly across a face, treat the result as a plausible reconstruction rather than a certainty. These old photo revival techniques combine repair, enhancement, and reconstruction while still requiring human judgment
Is colorizing a black-and-white photo “faking” it?
Not in any harmful sense, but it’s worth being clear-eyed that it’s an estimate rather than a recovered fact. Most people are comfortable with that, the same way they’re comfortable with a hand-tinted photograph from the era itself—just worth mentioning if you’re sharing it as though it settles a genuine question, like the exact color of an outfit.
Why does my restored photo look worse in some ways than the original scan?
This is usually over-sharpening or over-colorization that pushes the image away from looking like a photograph. Ask for a more restrained, natural result, and consider explicitly requesting that some original grain and softness be preserved.
Should I keep the original damaged photo after restoring it?
Yes — a restoration is a new derived image, not a replacement for the original. Keep the original print or scan safely stored, no matter how good the restored version turns out.
Can I combine restoration with the creative 1980s trend — say, restore an old photo and then stylize it further?
You can, but it’s worth treating them as two distinct steps with two different goals — restore first, faithfully, and only then decide whether you want to also apply a creative reinterpretation on top, being clear with yourself and anyone you share it with about which parts are recovery and which parts are invention.
What’s the single most useful thing to say in almost any restoration prompt?
An explicit instruction not to alter the people, their expressions, or the composition — restoration 1980s prompts benefit from less creative interpretation, the opposite of most prompts elsewhere in this series.
Final Thought
The rest of this series is about persuading an AI tool to invent a moment that never happened. This one is about the opposite discipline — asking it to recover a moment that genuinely did, as faithfully as the damage will allow, and being honest about the parts (mainly color) where “recovered” really means “a good guess.Digital photo restoration tools have made it easier for families to preserve valuable photographs without requiring professional editing skills. With that distinction in mind, restoration is arguably the most quietly rewarding way to spend an afternoon with these tools—not because the result is more impressive, but because what you get back is real.